
Sitecore 10 Installation | Development environment setup | Multiple Instances with different SIF's
- Sathyamoorthy Srinivasan

- Dec 15, 2021
- 2 min read
A year back Sitecore 10 has been launched, But I got chance to start checking it out recently. To get the site up & running, I chose to install it using the SIF – Installation framework (Which I always prefer). In this post I am going to share my experience during the setup.
As we all know PowerShell scripts makes our life lot easier especially during the troubleshooting in mid installations and this was another reason why I am preferring SIF rather than SIA GUI. The steps are quite same as the previous versions of the product. But this time, it uses SIF 2.3.0 for the installation process. If you are working in a different version of sitecore & got a requirement to hosting them as a separate instances sitecore services & SIF version, this blog would help you 😊.
1.a Sitecore Repository
Install-Module -name SitecoreInstallFramework -RequiredVersion 2.3.0 -Repository SitecoreGallery1.b Packet Manager Console
Install-Package SitecoreInstallFramework -Version 2.3.0 -Source https://sitecore.myget.org/F/sc-powershell/api/v3/index.json2. List the Available Installation Frameworks
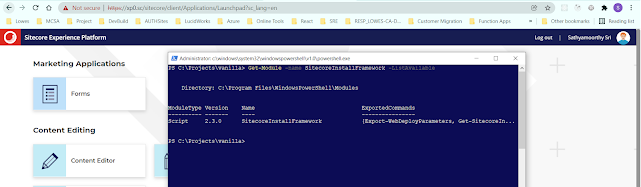
3. Choose & Import the available Installation Frameworks
Import-Module -name SitecoreInstallFramework -RequiredVersion 2.3.0 -ForceOnce you have chosen the right version, you can download and install SOLR and have it available on port 8983. Once that is available, download the XP0 Single Package from Sitecore and unzip the package in c:\source\sitecore10 folder or your choice.
4. Installation
Now run the Installation Configuration for prerequisites using the following:
Install-SitecoreConfiguration -Path .\Prerequisites.jsonWe might need few customizations over a configs on XP0-SingleDeveloper.ps1 script
$Prefix = "sc10"
$SitecoreAdminPassword = "b"
$SCInstallRoot = "C:\source\sitecore10"
$LicenseFile = "$SCInstallRoot\license.xml"
$SolrUrl = "https://localhost:8983/solr"
$SolrRoot = "C:\Program Files\solr-8.4.0"
$SolrService = "Solr8.4"
$SqlServer = ".\SQLEXPRESS"
$SqlAdminUser = "sa"
$SqlAdminPassword = "password"
Here you go,
.\XP0-SingleDeveloper.ps1It will take you through the hacker pro screen where you can see the scripts gets executed & commentary will help you to see if everything goes smoothly 😊 If something wrong we might need to check the same console for errors.
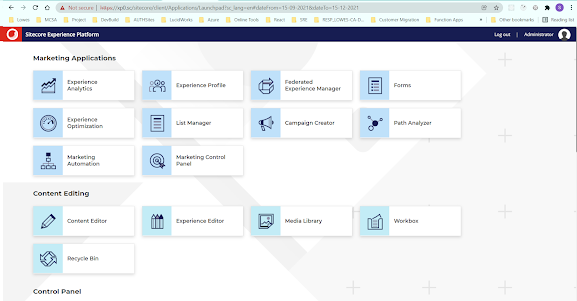
Tadaaaa! Installation is done on your box I believe,
Site Home - Dashboard
IIS

Services Console

Hopefully, there must be issues during the installation on Marketing Automation & other windows services app let me write another blog to describe how I fixed them 😊
Thank you for the time on my post!..
-Sathya


Comments